Highlight Most Popular Categories for new visitors

Experience Hypothesis:

When we prominently feature the most popular product categories on the homepage, we expect that new visitors will be more inclined to explore and engage with these categories.

Experience Assumptions:

New Visitor Engagement: New visitors may not be familiar with the website's offerings, and highlighting popular categories can help them discover relevant products more easily.

User Behavior: We assume that by showcasing the most popular categories, we are aligning with the preferences of a majority of our customers based on historical data.

Enhanced Visibility: The strategic placement and visual prominence of these popular categories will capture the attention of new visitors and encourage them to click and explore further.

Setting up the experience on Visually

(Build time: 6 minutes)

1. Click on "Create a New Experience."

Screenshot 2024-04-16 at 13.03.32


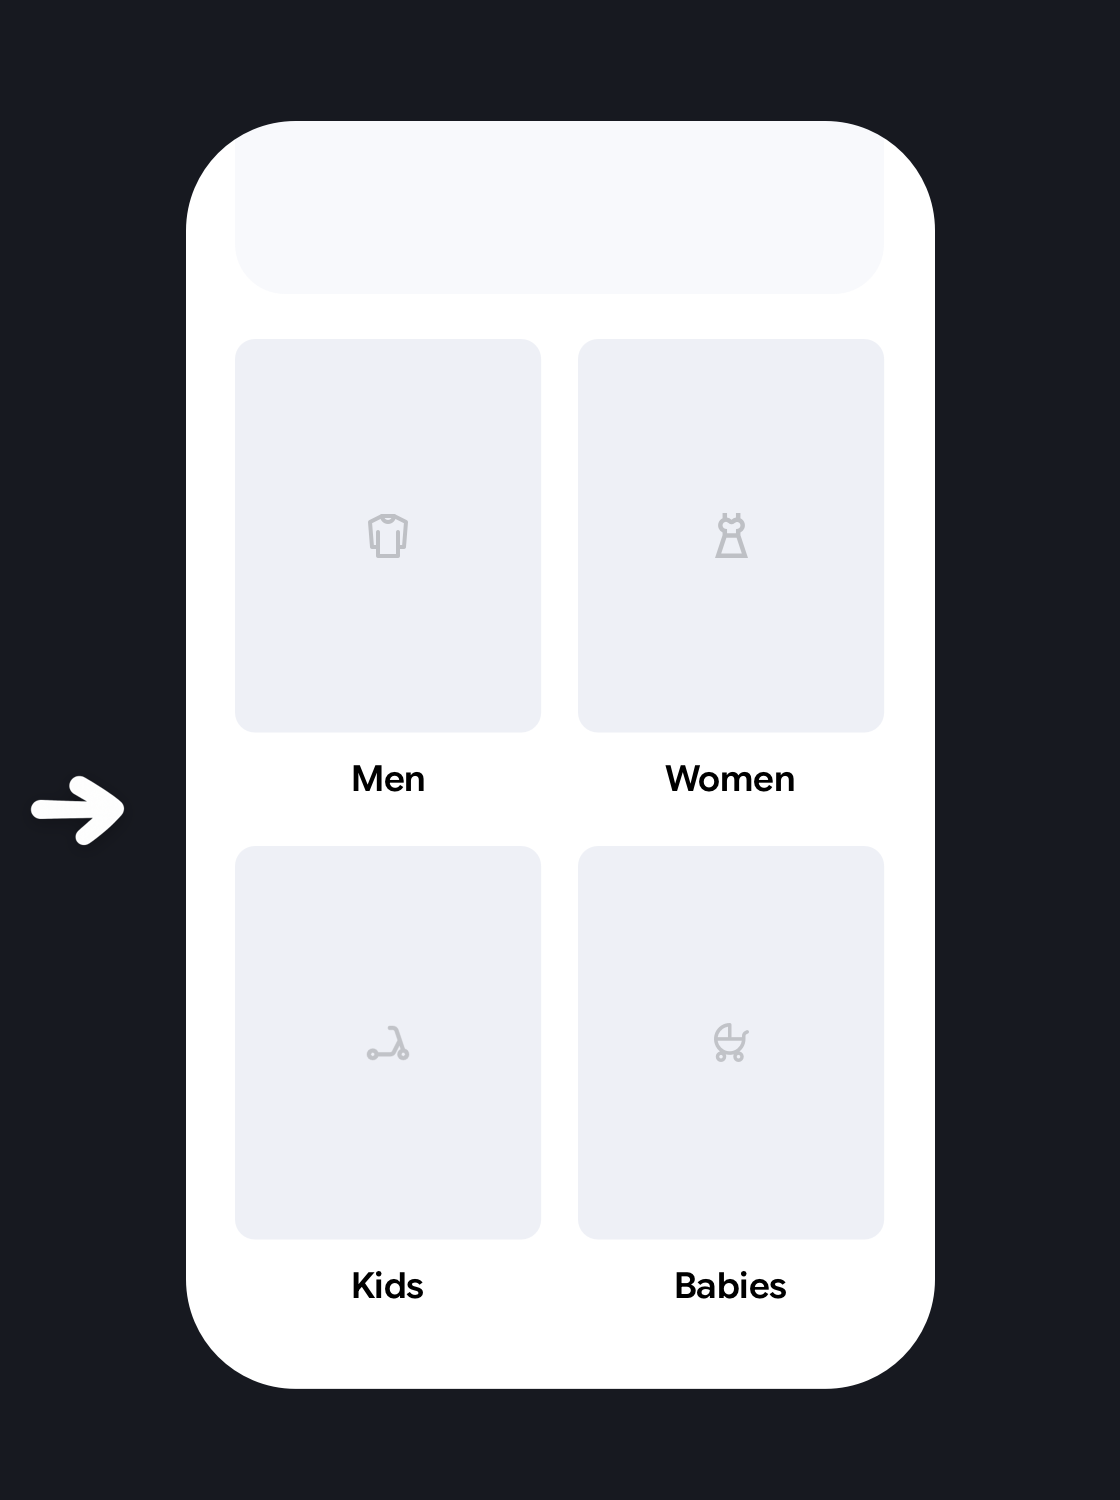
2. Access the editor on the left side, choose the location of the new widget, and add a Column widget located in the Content Blocks collection.

Screenshot 2024-04-25 at 00.42.29

Screenshot 2024-04-25 at 00.46.26


3. To each block, choose a copy for the CTA buttons, add a background image, and set a URL link to each one of the elements mentioned.

Screenshot 2024-04-25 at 00.48.45

4. Click on Customize 

Screenshot 2024-04-25 at 00.51.54


5. Customize the CTAs and blocks to match your brand's look and feel

Screenshot 2024-04-25 at 00.57.02


6. Once you are ready, click on Apply > Save

Screenshot 2024-04-25 at 00.57.52

Screenshot 2024-04-25 at 00.59.23


7. Click on the three dots icon to open the menu and choose the Duplicate option

Screenshot 2024-04-25 at 01.00.22

Screenshot 2024-04-25 at 01.01.31


8. Choose the location of the new duplicated widget

Screenshot 2024-04-25 at 01.03.59


9. Click Continue

Screenshot 2024-04-25 at 01.05.10


10. Click on the new change to edit it

Screenshot 2024-04-25 at 01.06.30


11. To each block, choose a copy for the CTA buttons, add a background image, and set a URL link to each one of the elements mentioned.

Screenshot 2024-04-25 at 01.08.26


12. Once you are ready, click on Apply > Update > Save

Screenshot 2024-04-25 at 01.11.43


13. In section No. 1, set the audience the experience will target, for example, First Session users. Set the device type the experience will target and the page, in this case - Homepage.

Screenshot 2024-04-25 at 01.18.21


14. In the changes list, click on each change > select "Mobile Homepage" or "Desktop Homepage" depending on the device you're running this experience for. This will make sure that the experience is displayed only on the homepage.

Screenshot 2024-04-25 at 01.19.54


15. Save the changes,  preview the experience, and you can test it!

Group 16 Potential uplift of 3% to 7% in CR.

u0
u0

Checkout how leading brands are exemplifying this experience

Screenshot 2024-01-15 at 11.54.31 Watch: Step by step walkthrough video play