Prediction
Incentive alignment: aligning upsell recommendations with shoppers' choices and offering discounts can boost conversion rates.
UX optimization: Well-designed and visually attractive upsell options in the cart interface enhance user engagement and encourage customers to make additional purchases.
 |
Potential uplift of 3% to 6% in AOV. |
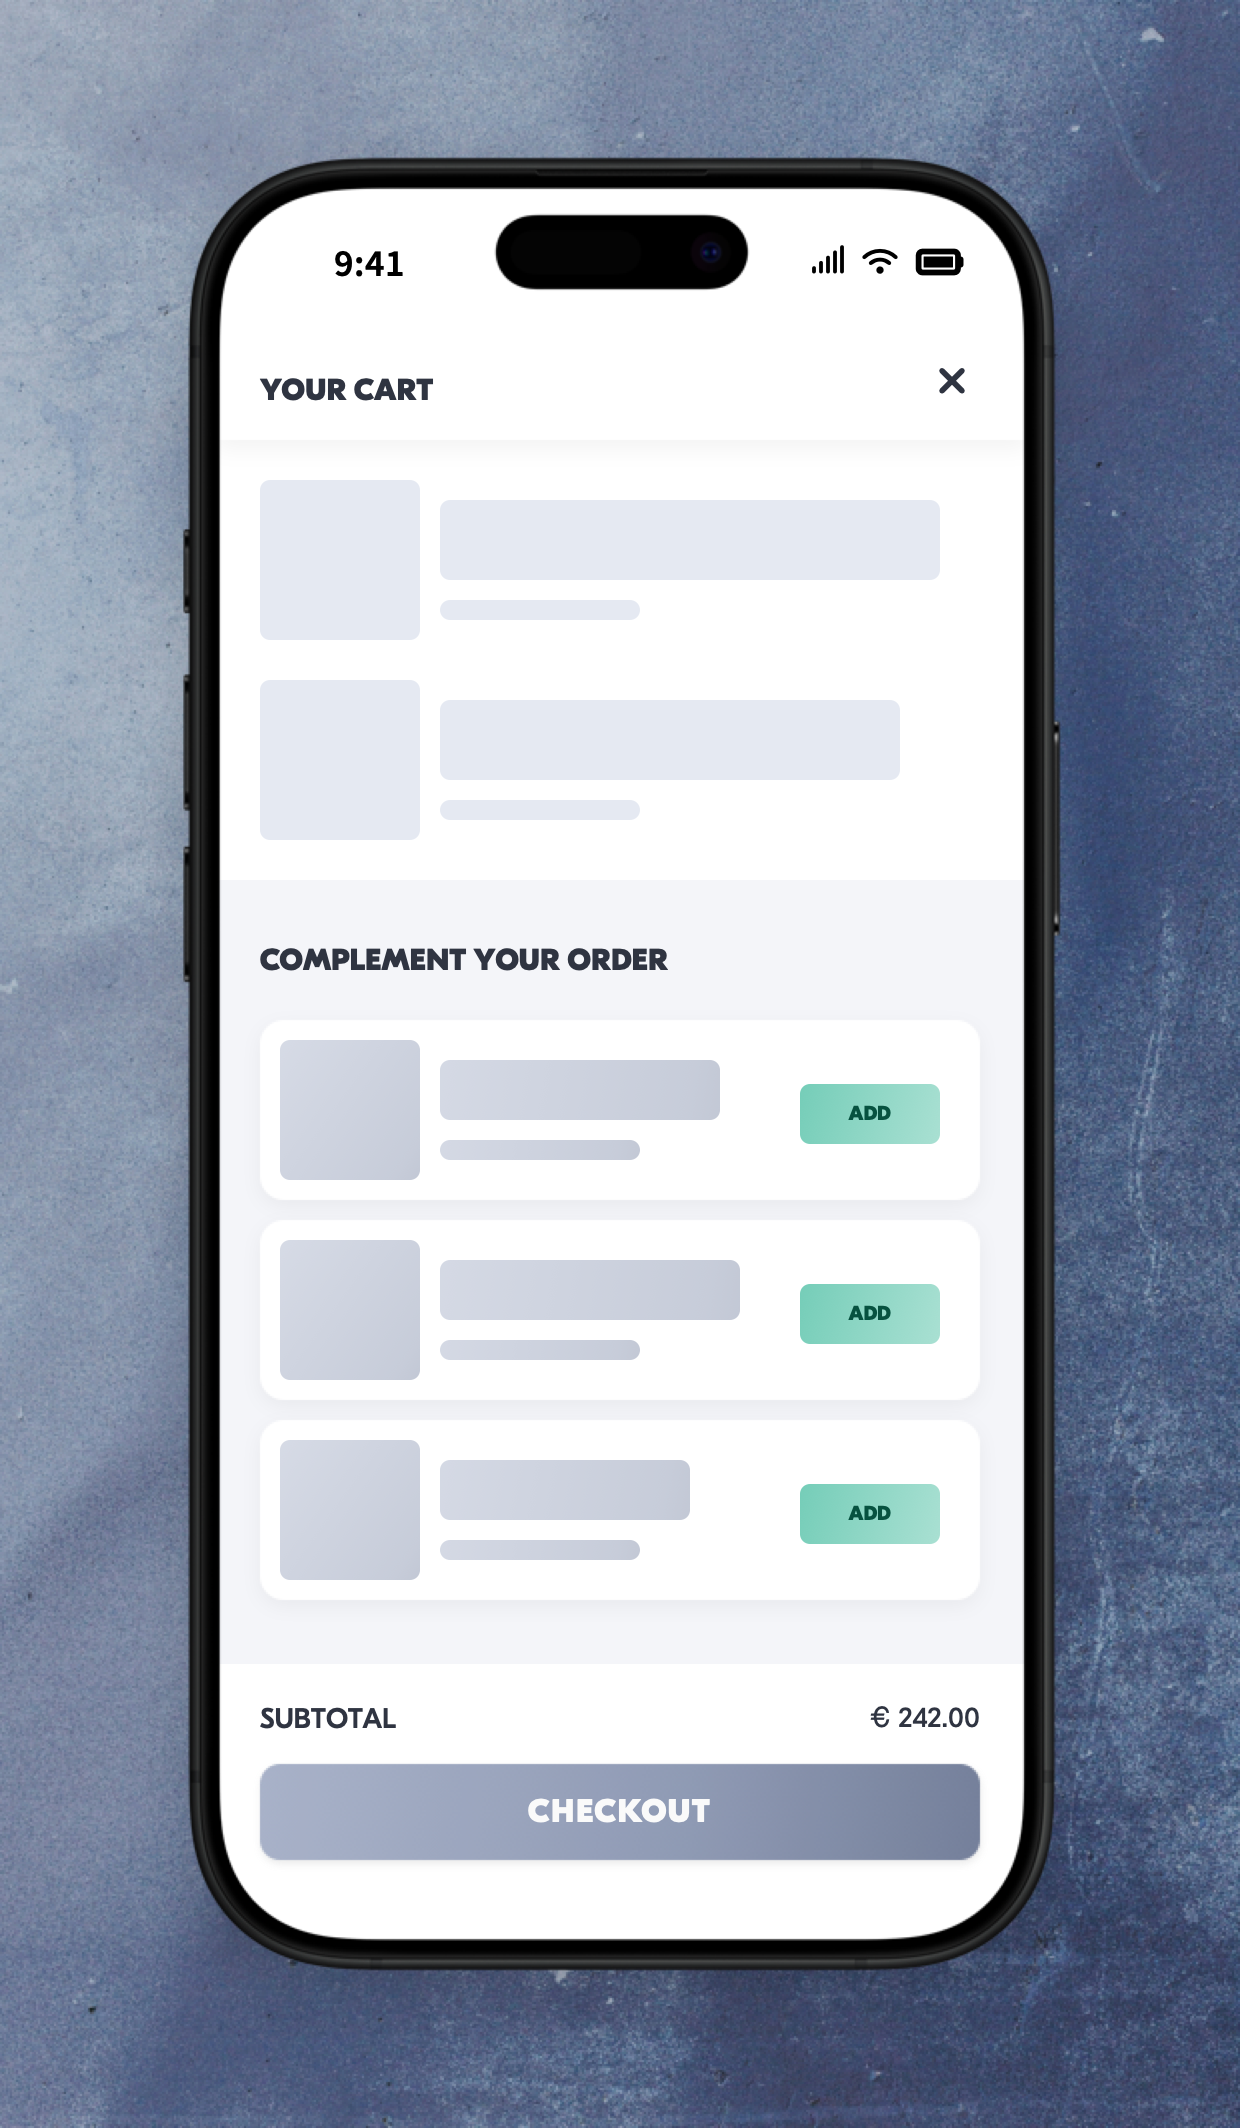
Setting up the experience on Visually
BUILD TIME: 3 MINUTES
Step 1 - Set the scope
Define the conditions required to trigger the experience. Ensure your defined scope is accurate, as a broader scope can dilute data by including unaffected sessions.
Audience → set to Custom Audience → add the following filter:
CART ITEMS COUNT : GREATER THAN : 0
This will ensure that you only measure sessions with a certain purchase intent.

Pages → make sure that this parameter is set to All Pages.
Devices → set to 'Mobile Only'.
Trigger → make sure that this parameter is set to 'Page Load'.
Step 2 - Set the changes
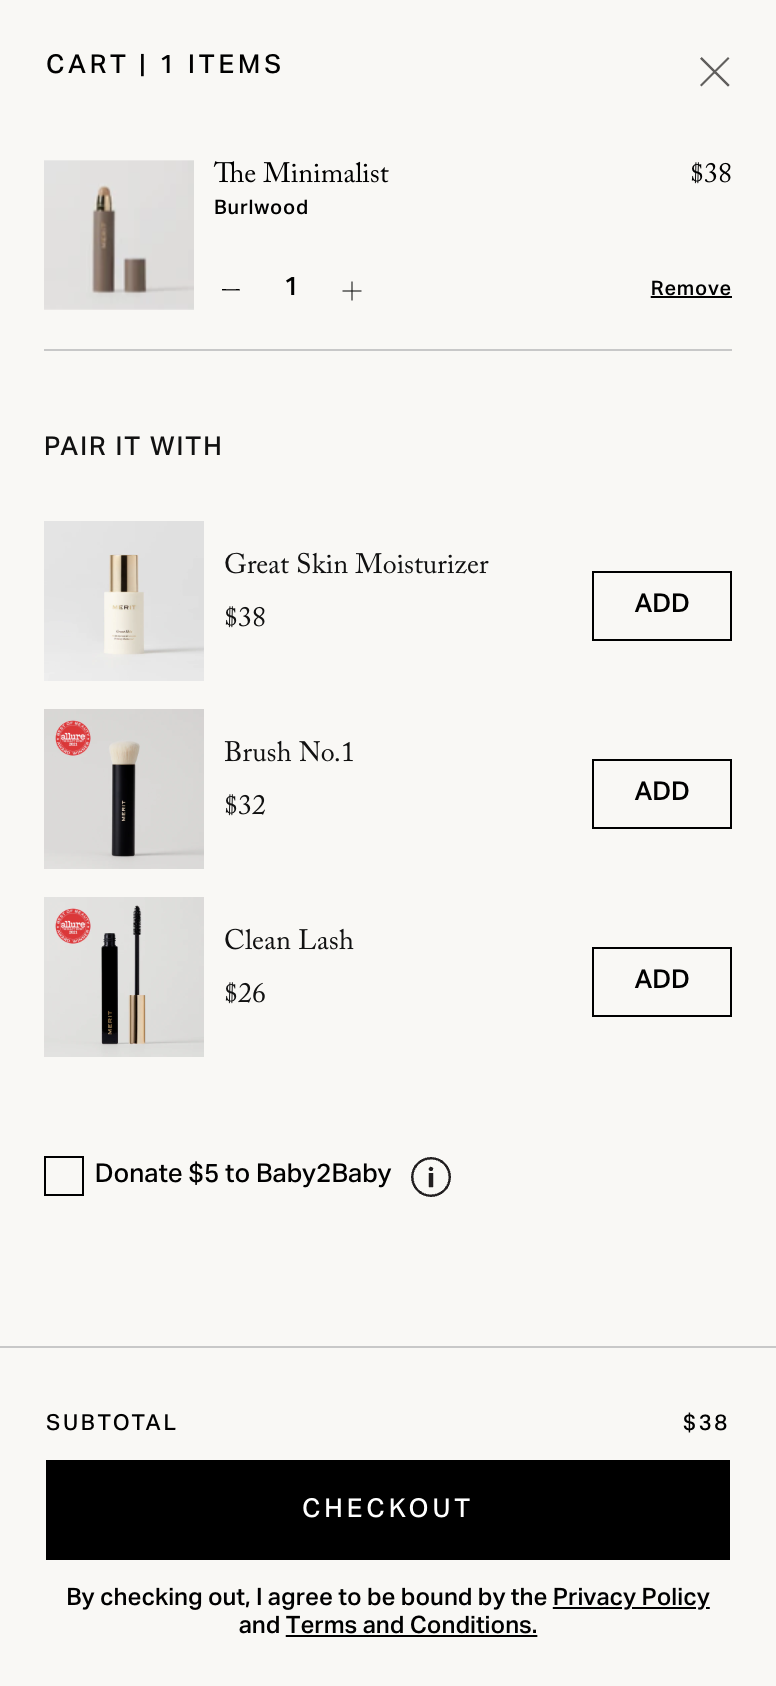
Set the cart preview
Make sure that the cart within the preview window has at least one product.


Add the upsells widget
By either replacing an existing widget, or adding a new one, select a position → select ‘Product Upsells’ → select the desired layout.


Configure the layout
Set the amount of products to be displayed, and all other settings within the ‘General Customization’ section → make sure that the widget includes an add-to-cart button.


Set the base strategy
Scroll down to choose the algorithm that will populate this widget. We suggest starting with an algorithm designed to reach a wider audience and then refining and personalizing it through subsequent iterations.
We recommend starting with one of the following options:
-
Personalized: our Ai-driven algorithm will adjust the upsells widget based on each individual shopper and session.
-
Purchased together: will display products most commonly purchased along with the current existing cart items.
-
Viewed with recently viewed: will display products typically viewed in the same session as the shopper’s recently viewed.

Add a filter (optional)
You can apply extra filters to customize upsell offers, ensuring they resonate with your target shopper persona and reflect your brand's philosophy.
We encourage you to explore one of the following approaches:
Complement the cart → offer products from complementary collections/tags, going hand-in-hand with the items the shopper already intends to purchase.

Limit the price → offer products that your cost-aware shoppers can afford in addition to their current cart subtotal.

Free shipping goal → offer products whose price will reach the free shipping goal. This can be more effective if your cart features a dynamic free shipping bar.

Reviews threshold → offer products that are rated above a certain threshold, and/or above a certain rating count, leveraging powerful social proof principles.

Adjust the style
Ensure that the changes’ styling align with your brand identity. You can also save your styles for future use.
For more on reusing styles, refer to this article.

Apply changes to all pages
This will ensure that the experience appears consistently across the session, particularly if your brand uses the more conventional cart drawer instead of a cart page.

Save and name the experience
You can also provide a description → click 'Next' to confirm.
Step 3 - Preview & QA
In order to make sure that the experience works as intended, we highly encourage you to perform a quality assurance (QA) session using our 'Preview' feature.
-
Click on ‘Preview’ → ‘Share’ → ‘Copy Link’
-
Open the link on the specific device(s) you intend to test. For the best results, we suggest using incognito mode to ensure a clean session without any prior browsing history or cached data.
For additional guidance on performing quality assurance with Visually, please refer to this article.
Step 4 - Finalize & Publish

We strongly suggest starting with an A/B test to assess how this experience affects your store's performance.
-
Click on ‘Next’ to begin.
-
Initiate an A/B test → navigate to section 3 and select ‘Yes, sure’.
-
Name the variation(s) → we recommend that you name the variations according to the specific hypothesis you’re testing, for example:
-
Original / Personalized
-
Original / List
-
Personalized / PWRP
-
List / Slider
-
No filters / FS filter
-
-
Set the allocation → we suggest starting with a 50/50 split to obtain results quickly and reliably.
If you prefer to conduct a preliminary sanity check, consider a 80/20 allocation for initial validation, then transition to 50/50 for comprehensive testing.
Keep in mind that achieving statistical significance may take several days, especially with lower allocations. For guidance on analyzing and monitoring your A/B tests, refer to this article.
-
Set the goals → click on ‘+’ to select goals → for this experience, we recommend the following KPIs:
-
Conversion Rate
-
Average Order Value
-
Per Session Value
-
Product Details Views Rate
-
Checkout Rate
-
-
Set the primary goal → we recommend using ‘Average Order Value’ for this test.
-
Publish the experience when ready!
 Watch: Step by step walkthrough video
